Thinking about how to install architectural shingles on your roof? Architectural shingles are a durable and stylish roofing option that provide your home with added protection and great curb appeal. Whether you’re a hands-on homeowner or simply curious about the process, this guide walks you through the essential steps to get the job done. Here’s what we’ll cover in this post:
- What you should know before installing architectural shingles
- 7 steps to installing architectural shingles
- Maintaining your shingles for long-lasting performance
👉 What You Should Know Before Installing Architectural Shingles

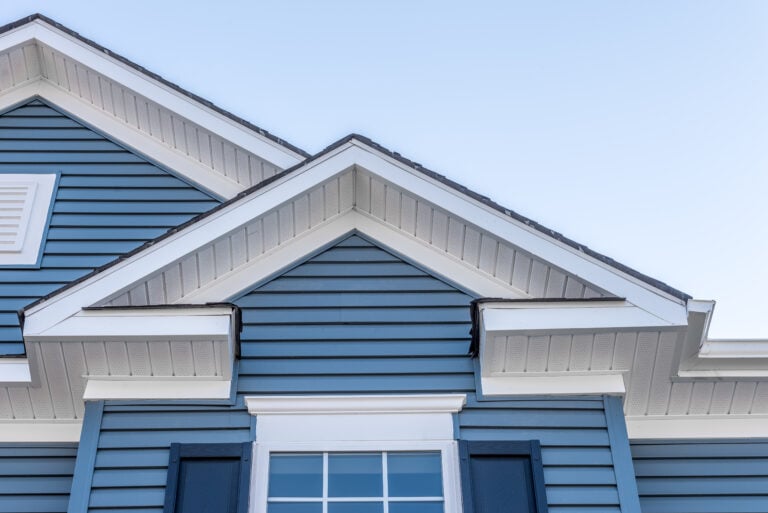
Architectural shingles, also known as dimensional shingles, are created by layering asphalt shingles for a textured, three-dimensional look. These shingles are not only aesthetically pleasing but also highly durable, making them an excellent choice for any climate. Key benefits include:
- Enhanced Durability: Resistant to high winds and extreme weather conditions.
- Stylish Design: Available in a range of colors to match various exterior designs.
- Longevity: With proper installation, these shingles can last 25–30 years or more.
How to Prepare Your Roof Properly
- Inspect and clean the roof deck to remove debris, old nails, or damaged shingles.
- Make necessary repairs to fix damaged areas and replace rotted wood.
- Install a drip edge to guide water into the gutters.
- Roll out roof underlayment for added moisture protection.
✅ 7 Steps to Installing Architectural Shingles

Follow this step-by-step process to install architectural shingles like a pro.
1: Lay Down an Ice and Water Shield
Start along the roof’s edge by placing an ice and water shield, which is a self-adhesive waterproof membrane. This crucial layer provides protection against water damage caused by melting ice, heavy rain, and wind-driven moisture. Begin by rolling out the shield along the roofline, ensuring it overlaps the drip edge. Press it firmly into place to activate the adhesive and create a strong bond with the roof decking. This step is especially important in regions prone to freezing conditions, as it helps prevent ice dams from causing leaks.
2: Position the Starter Shingles
Lay starter shingles along the drip edge at the roof’s edge. Starter shingles are specially designed to create a strong foundation for the rest of the roof. They also protect the decking from water infiltration by sealing the edges where the shingles meet the roofline. Align the starter shingles so they overlap slightly with the ice and water shield. Nail them into place, ensuring each nail is properly embedded for a firm hold. This step not only helps prevent water seepage but also enhances wind resistance by securing the shingles firmly in place.
3: Install the First Row of Architectural Shingles
Once your starter shingles are in place, it’s time to install the first row of architectural shingles. These shingles are designed to provide both durability and a visually appealing finish. Begin by snapping a chalk line above the starter strip as a guide to ensure the first row is perfectly straight. Position each shingle directly above the starter strip, aligning the bottom edge with the chalk line. Use four nails per shingle—one near each corner—to secure them in place. This step is critical for creating a strong, long-lasting foundation for the rest of the shingles.
4: Stagger the Rows
To achieve a dimensional, layered look and improve water resistance, offset each subsequent row of shingles by half a tab. This means the seams from one row will not align with the seams of the row below. Staggering the shingles helps prevent water from penetrating through the seams and enhances the overall strength and durability of the roof. Mark your offset with a chalk line to maintain consistency as you work your way up the roof. Staggering also creates a more polished and professional appearance, adding to the aesthetic value of your home.
5: Cut Shingles Along the Edges
When you reach the edges or corners of the roof, carefully trim the shingles to fit. Use a utility knife and a straight edge for clean, precise cuts. Measure each piece accurately to ensure a snug fit against walls, chimneys, or other structures. Properly cutting and fitting the shingles prevents gaps that could allow water to seep in. Take your time during this step, as poorly trimmed shingles can compromise the roof’s overall watertight seal and diminish its finished appearance.
6: Add Ridge Cap Shingles
The ridge cap shingles are the finishing touch to your roofing project and play a vital role in protecting the roof’s peak. These specially designed shingles are installed over the ridge to shield it from water infiltration and provide a neat, polished look. Start at one end of the ridge, overlapping each shingle slightly with the one before it. Nail each shingle securely in place, using nails designed to withstand high winds. Ridge cap shingles not only protect your roof but also help improve ventilation by allowing warm, humid air to escape from the attic.
7: Inspect Your Work
Before declaring your roofing project complete, take the time to thoroughly inspect your work. Look for any gaps, loose nails, or uneven rows of shingles that could compromise the roof’s integrity. Check the edges, ridges, and flashing to ensure everything is sealed properly. Pay special attention to any areas where water might pool or seep through. A careful inspection helps ensure that your roof installation is durable, watertight, and ready to withstand the elements for years to come. Address any issues you find promptly to avoid future problems.
🛠️ Maintaining Your Shingles for Long-lasting Performance

The key to extending the life of your architectural shingles is regular maintenance. Here’s how:
Inspect Regularly
Your roof is your home’s first line of defense against the elements, so it’s essential to inspect it regularly. Look for cracked, loose, or missing shingles, especially after strong storms or heavy winds, as even small damages can lead to bigger issues if left unaddressed. Pay attention to any signs of wear and tear, such as curling shingles or exposed roofing material, and address them promptly to prevent leaks or structural damage.
Clean Your Gutters
Clogged gutters can cause serious problems for your roof. When leaves, twigs, and debris block the flow of water, it can back up and seep under your roofing materials, causing leaks and water damage. To prevent this, clean your gutters and downspouts regularly, especially during the fall when leaves are most likely to accumulate. Consider installing gutter guards to make the process easier and reduce the frequency of cleaning.
Remove Moss and Algae
Moss and algae might seem harmless at first, but they can wreak havoc on your roof over time. Moss absorbs water, keeping your shingles damp and increasing the risk of rot, while algae can discolor your roof and weaken its integrity. Use a mild cleaning solution or specialized roof cleaner to safely remove these growths, and consider installing zinc or copper strips along the ridge of your roof to prevent them from returning.
Schedule Professional Inspections
While regular DIY maintenance is essential, having your roof inspected by a professional can catch issues you might miss. Experts, like the team at Kornerstone Roofing, can identify hidden problems such as small leaks, weak spots, or aging materials that may lead to costly repairs if left untreated. Schedule periodic inspections—ideally once a year or after severe weather—to ensure your roof remains in excellent condition and continues to protect your home effectively.
⭐️ Shingle Installation Guide
Installing architectural shingles requires precision, skill, and the right materials to ensure a durable, long-lasting roof. At Kornerstone Roofing, we bring expert craftsmanship, top-quality materials, and unmatched customer service to every project, making us Saratoga County’s trusted roofing contractor.
With proven results and countless satisfied homeowners, we’re here to make your roofing experience seamless and stress-free. Ready to upgrade your roof? Contact Kornerstone Roofing today for a free consultation and let us take care of your roofing needs with the quality and care you deserve!